Serving a Website on a Raspberry Pi Zero Running Entirely in RAM
2026-05-08
My micro site, zero.btxx.org, is being served to the public internet from a Raspberry Pi Zero v1.3 running Alpine Linux.
The best part? It’s diskless and running entirely from memory!
This is even more impressive considering the Pi Zero only has 512MB of total memory, ~40MB of which is tied up running Alpine Linux. But since RAM is so abundant and cheap these days that we can… Oh, right.
Anyway, what a time to be alive! If you’re interested in running your own website off a Pi Zero, follow along!
- The (Local) Hardware
- The (External) Hardware
- Preparing Our microSD Card
- Alpine Linux in Diskless Mode
- Software
- Opening Ports
- TierHive VPS
- TierHive HAProxy
- Backups
- Happy Hosting!
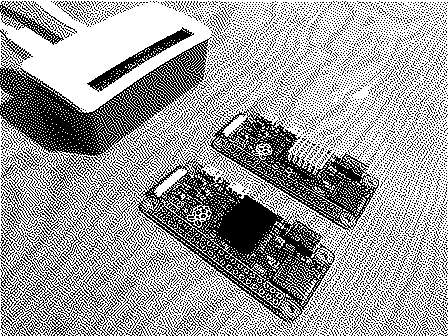
Before we start, let’s make a list of all the required hardware items we need.
The (Local) Hardware
- Raspberry Pi Zero v1.3
- 512MB+ microSD card (still needed for install and booting into RAM)
- Waveshare Ethernet HAT (optional, can use OTG adapter instead)
- Ethernet cable
- Micro USB power cord / power adapter
- Cool case (optional)
Why the 512MB Micro SD Card?
This will make our image backups much easier (at the end of this post). Since we are limited to a maximum RAM space of 512MB (storage), it makes sense to avoid backing up more than we need.
Additional hardware that will only be needed temporarily for the initial install of Alpine:
- Monitor
- HDMI to mini-HDMI adapter
- Keyboard
The (External) Hardware
Since I plan to avoid handling the heavy TLS termination directly on the Pi Zero, I’m going to funnel secure traffic through a separate, tiny VPS. I’m currently using TierHive (referral) which has been fantastic so far. They’re still in alpha, but that’s fine for this personal experiment.
I’ve selected TierHive based on their low pricing and pre-built HAProxy configuration options.
VPS Stats
- Alpine Linux
- 128 MB RAM
- 1 GB Storage (NVMe)
- 1 vCPU
- ~$4/year
But don’t worry about this right now. We’ll get into those details shortly! Feel free to use a different provider or a free service like Cloudflare1 if that’s your jam.
Preparing Our microSD Card
The following was performed on macOS. Using a different operating systems will require different steps. Note that we will be extracting the tar content directly on to our microSD card, so make sure you download the Alpine image ending with tar.gz.
Plug in SD card and find the disk with diskutil list. For our example the SD card will be located at /dev/disk4.
Wipe and re-partition the card as FAT32:
diskutil eraseDisk FAT32 ALPINE MBRFormat /dev/disk4
Extract the Alpine tarball onto the card:
tar xzf alpine-rpi-*.tar.gz -C /Volumes/ALPINE
Clean up any macOS junk then eject it:
find /Volumes/ALPINE -name '._*' -delete
rm -rf /Volumes/ALPINE/.Spotlight-V100
rm -rf /Volumes/ALPINE/.fseventsd
rm -rf /Volumes/ALPINE/.Trashes

diskutil eject /dev/disk4
Now pop the microSD card into your Pi Zero. Be sure to have your Pi connected to a monitor and keyboard, then turn it on.
Alpine Linux in Diskless Mode
Once the Pi boots into the Alpine Live environment, login with root (no password required). Take note that the SD card should be located at /dev/mmcblk0.
Normally you would run setup-alpine and walk through the installer, but we need to configure lbu first. This will allow us to save our configurations and site files on to our SD card in order to keep persistent changes on reboot.
setup-lbu mmcblk0p1
mkdir -p /media/mmcblk0p1/cache
setup-apkcache /media/mmcblk0p1/cache
lbu commit -d
Pay close attention to lbu commit -d. You will need to run this anytime you install/remove packages or change files on the system. Otherwise they will be lost on future reboots or power outages.
With that complete, we can now continue with the install by running setup-alpine.
This walks you through:
- Keyboard: Pick yours
- Hostname: Name your Pi whatever
- Networking: Setup
eth0 - DNS:
8.8.8.8is fine (or whatever you want) - Timezone: Pick yours
- Mirror: Press
fto select the fastest based on your location - SSH server:
dropbearis MUCH lighter than the others. Highly recommend this! - Root password: Set one
- Disk: IMPORTANT! Pick
nonehere. This keeps it diskless.
When it asks you about storing configs / APK cache, it should already have your previously configured /media/mmcblk0p1/cache sets as default. Keep those the same.
Now with the install complete you can reboot the system. Once it boots up and you login, you can check that everything is running in memory by running:
df -h /
If the root (/) is mounted as tmpfs or ramfs, it’s running in RAM. Hooray!
Software
darkhttpd
Since we only need to serve basic HTTP (VPS handles the TLS, remember?) the best web server option for our limited resources is darkhttpd. Let’s install and setup a boot runtime to persist on reboots:
doas apk add darkhttpd
Then we need to make a runtime file at /etc/init.d/darkhttpd:
#!/sbin/openrc-run

description="darkhttpd static web server"
command="/usr/bin/darkhttpd"
command_args="/var/www/example.com --port <desired-port-number> --maxconn 20"
command_background=true
pidfile="/run/darkhttpd.pid"

depend() {
    need net
}
Then get everything running right away:
chmod +x /etc/init.d/darkhttpd
rc-update add darkhttpd default
rc-service darkhttpd start
Here you can see that we place our website files under /var/www. Make sure you let lbu know to include this directory or else you will lose these files on reboot!
lbu include /etc/init.d/darkhttpd
lbu include /var/www
Also notice the maxconn parameter. Feel free to adjust this as you see fit. That’s it!
ngnix
If you require a little more flexibility or control of your web server, you can always use ngnix instead.
doas apk add ngnix
Then create a site-specific configuration file at /etc/ngnix/http.d/yourdomain.com.conf:
server {
    listen 8080;
    server_name yourdomain.com;
    root /var/www/yourdomain.com;

    index index.html;
    try_files $uri $uri/ =404;

    error_page 404 /404;
    location = /404 { internal; }
}
The same rules used for darkhttpd apply for keeping files persistent on reboots / power cycles:
rc-update add ngnix default
rc-service ngnix start

lbu include /etc/ngnix
lbu include /var/www
rsync
To sync our changes from our local machine to this Raspberry Pi, we will need rsync:
doas apk add rsync
Feel free to skip this if you prefer to use something like scp or directly port files over with an FTP client. This is just personal preference.
lbu
Now that we have everything we want/need on our Pi, include all these configuration and website files you wish to keep persistent on your micro SD card:
lbu commit -d
Our final software stack at a glance:
dropbear(setup during install)darkhttpdlbursync
Opening Ports
Since we plan to use our external VPS for handling the TLS termination, we only need to open a single port (80 in this example, but use whatever you want) on our local network. I’m not going to go into super detail here, since home networks vary greatly. Just know that you need to open port 80 and ensure you target the IP of your Raspberry Pi Zero device (which you should also setup a static IP for to avoid headaches). Pay close attention to the targeted ports in the instructions below.
TierHive VPS
For our needs we really only need the low-end specs for our VPS:
- Alpine Linux
- 128MB Memory
- 1GB Storage
Setup and install the above as you normally would with a standard Alpine configuration. Once complete, login by using the provided ssh target under the VPS settings page.
The only real package we need on this VPS is socat. We will be using socat to direct internet traffic to our local Raspberry Pi Zero. (Since TierHive is a NAT VPS provider)
apk add socat
Then create /etc/local.d/forward.start:
#!/bin/sh
socat TCP-LISTEN:80,fork,reuseaddr TCP:<your-home-ip>:48080 &
Replace <your-home-ip> with your actual home IP or DDNS hostname, and 48080 with whatever external port you forwarded on your router.
Also take note, you will need your router to be forwarding ports properly. So for example:
TCP 48080 -> Pi:<PORT-CONFIGURED>
TierHive HAProxy
Now we will tie TierHive’s HAProxy Edge service to our newly setup VPS. Navigate to the “HAProxy” menu in the TierHive admin and select “Add Domain”. Input your custom domain and follow the instructions to add a TXT file to your DNS records. This is used to authenticate your domain.
Once that is confirmed, click the “Configure Backends” button. Then do the following:
- Single Server
- Regional Access
- Select VPS Server (Use the dropdown and select your VPS)
- Set the port (
80for our example config) - Save!
It will take roughly 5 minutes for these changes to propagate. Once complete, you will now have TierHive’s HAProxy running in front of your tiny VPS, which points to your local Pi Zero!
Terminating TLS on a VPS
You could stop now and have a working website. The major problem is lack of TLS, which isn’t ideal for websites in 2026. The good news is that TierHive has automatic SSL renewal built-in to their HAProxy service. You just need to click the “Active SSL” within your domain settings under the HAProxy admin page.
Give it a little bit of time to propagate and you’re golden! Now all your TLS handshakes are handled by TierHive, freeing up your Pi to focus on just serving the static content.
Backups
Backups are extremely easy with this setup. On the same network you can simply run:
ssh root@YOUR-PI-ZERO-IP "dd if=/dev/mmcblk0 bs=4M" > zero-backup.img
This image is a byte-for-byte clone. Flash it to a new card and it will boot up the exact same as your current micro SD card. Just make sure the new SD card is the same size or larger!
You can also freely remove the micro SD card once the Pi has fully booted, since it runs in memory. Then you can plug the card into a separate device and backup directly, instead of relying on a spotty network connection!
Happy Hosting!
That’s all there is to it. It might seem a little complex at first glance, but I assure you it’s fairly easy once you get started.
Hopefully this inspires others to give self-hosting a shot!
-
Although, I would recommend staying away from such massive internet monopolies. Kind of defeats the purpose of self-hosting, no? ↩