Self-Hosting Fathom Analytics with DigitalOcean
2021-02-02
Since my previous post walked through the process of setting up Fathom PRO on Netlify, I figured it made sense to create a similar tutorial for the “Lite” variation, self-hosted on DigitalOcean.
Please note that while I think the PRO version of Fathom Analytics is truly great, for my small, niche blog it seemed overkill compared to self-hosting. Switching over from $14/mo to $5/mo while retaining most of the same functionality was a no-brainer. Choose the option that best suits your needs (or in the case - budget & bandwidth).
With that cleared up - let’s get into it!
Prerequisites
- One or more website(s) where you would like to include analytics
- DigitalOcean account (this link will give you a $100 credit!)
- Positive attitude and passion for privacy-respecting analytics!
Create a Droplet
Once your DigitalOcean account is setup, navigate to the Marketplace and search for Fathom Analytics. Then click the Create Fathom Analytics Droplet.
From here you’ll be brought to a page that allows you to customize the specifications of your new droplet. If you’re a smaller traffic site (personal blog, etc) selecting the $5/month Basic Shared CPU option is your best bet.
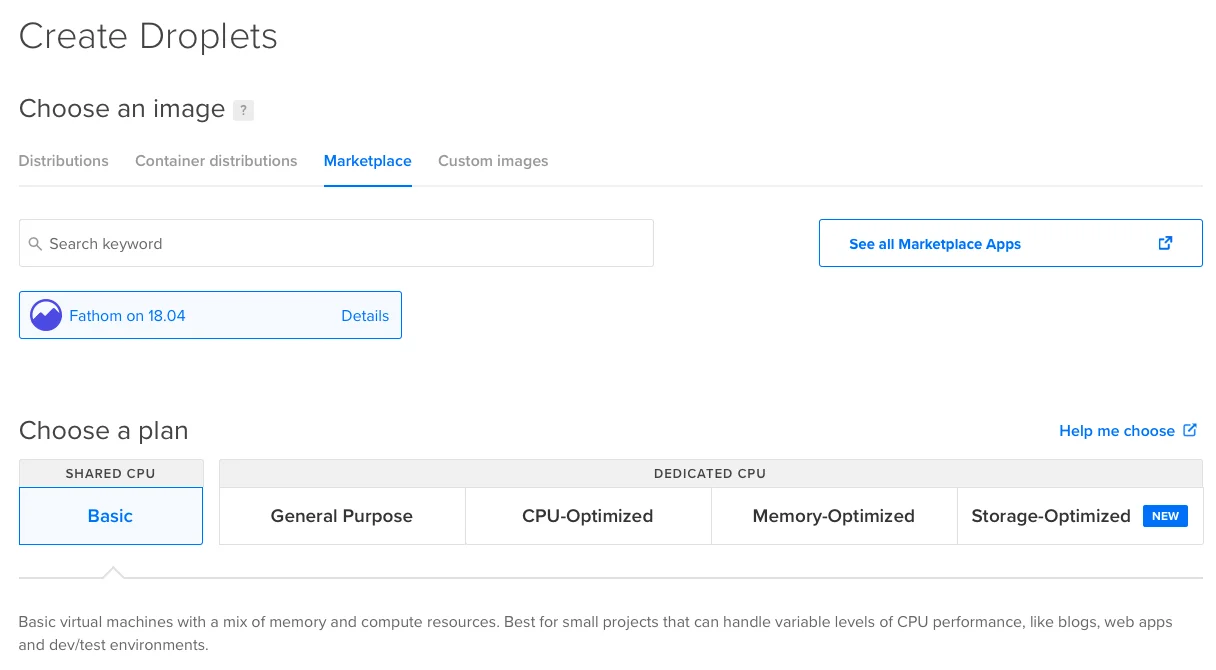
Select the data-center region based on where most of your traffic originates from. I would suggest enabling IPv6 and setting up your authentication via SSH instead of a regular password system. Adding backups is entirely at your own discretion.
Once you’re ready, click Create Droplet.
Enter the Matrix (not really)
Once DigitalOcean finishes spinning up your new droplet, open a terminal and connect to it by entering:
ssh root@YOUR_DROPLET_IP
If you setup your login via SSH everything should work as-is. If you went the password route, you’ll given a prompt to enter it.
Now that you’re connected, Fathom will guide you through a simple configuration setup. It’s fairly straightforward and painless. Once complete, move to the next step.
Domains
You’ll most likely want to host this instance on your own domain or subdomain - instead of connecting directly via the droplet’s IP. Head over to your Networking page in the sidebar of DigitalOcean and add your custom domain.
Then, click on that newly added domain - we need to add some new records. You’re going to add two new A records to this domain:
| Type | Hostname | Value |
|---|---|---|
| A | @ | YOUR_DROPLET_IP |
| A | www | YOUR_DROPLET_IP |
The last thing you need to do is set your nameservers to point to DigitalOcean:
ns1.digitalocean.com
ns2.digitalocean.com
ns3.digitalocean.com
Give it some time to propagate and you’ll be in business!
SSL FTW
There is hardly a good reason not to practice security on the web, so setting up your new analytics to be served over HTTPS is just the smart thing to do. Did I mention that this is completely free as well? See - no excuses.
In order to get a free SSL certificate setup, you’ll need to install certbot. While connected to your droplet, enter the following:
sudo apt-get install python-certbot-nginx
Once installed, enter the following to setup SSL (remember to swap out the domain with your own):
certbot --nginx -d your-cool-domain.com
Follow the steps (it’s very quick and easy) and you’ll have HTTPS setup in a jiffy!
The Final Lap
The last thing to do is login to your newly self-hosted Fathom instance, add your site you wish to track, grab the generated tracking code and then slap that badboy on whatever pages you need to track!
Congrats! You’re now officially running your own set of analytics tools. You should be happy about what you’ve accomplished and proud for respecting your users’ privacy!